


Meat Lab
Posted on March 18, 2009 – 8:29 PM | by beckler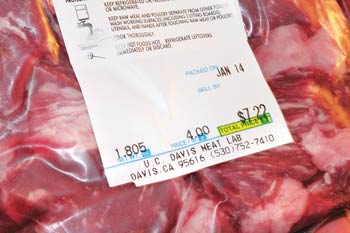 The University of California at Davis is an invaluable resource for the greater Sacramento area. There’s the Mondavi center, which attracts prestigious cultural events, and there’s the newly created Robert Mondavi Institute for Wine and Food science, which complements the longstanding and well-respected viticulture program. And then there’s the meat lab. Because for all its high-falutin’, intellectual trappings, Davis is still an agricultural school at heart, which means that you can occasionally catch a sweet whiff of manure from almost anywhere in town, and also that students are being trained to raise and slaughter livestock. This meat is available to the public at the meat lab on Thursdays and Fridays, from 1 to 5.
Caleb Sehnert is the manager of the meat lab, and he was kind enough to give me, Liv Moe, and our friend, Der Skipper, a tour. Skipper is an adventurous epicure and he had agreed to cook a meal for us using whatever we bought at the meat lab.
There was a line outside the door when we arrived right before 1 on Thursday. As soon as Caleb opened the doors, the people rushed in and started piling their arms high with meat. One couple must have had thirty pounds of flesh between them.
Caleb led us into the hallway away from the public vestibule, and into the cutting room. The entire meat lab is kept cold, to deter microbial growth, and in general, lives up to the expected cliché by looking like something out of Texas Chainsaw Massacre. But Caleb was so matter of fact and friendly about everything that it wasn’t creepy at all. Well, maybe a little bit.
In the cutting room, James Kincheloe and Heather Welsch were grinding a tub of bright red cubes of meat into hamburger. This room has lots of cool gadgets, such as a brine injector and a computer-controlled smoker.
Next we went into the room where they hang the carcasses from hooks. After slaughter, the carcasses are hung there for at least 24 hours to “rest”, and for up to 45 days for the dry aged beef. The temperature and humidity levels are tightly controlled. After we worked out by punching the sides of beef for a while, Caleb led us to the killing floor. It’s where they slaughter all the different types of animals that the meat lab processes: hogs, cattle, and lambs.
The killing floor was spotlessly clean, as were all the rooms we saw. Caleb explained that there is a USDA inspector on the premises whenever an animal is being slaughtered. All the animals are slaughtered according to USDA guidelines, in a manner which they deem humane. He pointed out the doors that the animals come through. The pigs are first stunned with an electric stunner, and then killed, and the cows are killed instantly with a captive bolt gun. The blood runs into a drain on the floor, and there’s an offal cart, where the “pluck” (heart and lungs) are heaped for the USDA inspector to examine for signs of disease. Because UC Davis is also a school in which biological research is being conducted, sometimes the ag students are asked to harvest a particular part for a faculty researcher, such as a pig cerebellum.
A device charmingly named the “hog scalder” is stored on the killing floor. If a hog isn’t skinned, it’s placed in the hog scalder to clean off the hair. The animals are hoisted up for processing, and there’s a hydraulic saw that the operator can wield while standing on a platform that raises and lowers. All in all, Caleb said that it takes two teachers and 4 students about 45 minutes to process a cow.
On our way out the door, we bought beef stew meat and pork tenderloin for our meat lab supper. The meat at the meat lab is exceedingly cheap, especially considering the scrupulous cleanliness that is guaranteed. I went back for pork chops and they were some of the most tender and juicy chops I’ve ever eaten. The recipe for Der Skipper’s goulash follows, and it was wonderful. Serve it with homemade spaetzle.
Skipper’s Hungarian Goulash
Serves 4
Any pot will work for this. A heavy-bottomed stewing pot or enamel-coated dutch oven would be better if only to maintain a more consistent temperature throughout the braising time.
Cooking and Preparation Time: 1 hr. 15 Min.
Ingredients
1 lb Beef/pork cut for stewing (leg, shoulder, neck, etc.) (cubed to 1½” pieces)
2 tbs Fat (butter, oil, bacon fat)
2 Onions (medium dice)
3 Garlic cloves (minced)
1 Red bell pepper (small dice)
1 Green bell pepper (small dice)
2 c Beef broth
2 tbs Tomato paste
1 Fresh chili pepper (any of the long thin red variety; e.g., cayenne) (adjust to taste)
1 Bay leaf
1 tbs Hungarian paprika
1 tsp Caraway seed
1 tsp Salt and Pepper
Bring fat up to smoking temperature. Sear meat on all sides until browned (in batches if necessary). Remove and set aside. Saute onions and bell peppers until soft. Add garlic. Return meat to pot. Mix in tomato paste to coat everything.
Add the bay leaf, paprika, chili pepper, caraway seed, salt/pepper, and beef broth. Bring to a boil, reduce heat and simmer for 60 minutes or until meat is tender. Re-season with salt/pepper and paprika to taste.
Recommended to be served with egg noodles or spaetzle:
Spätzle
Serves approx. 4-6:
1½ c All-purpose flour*
6 Eggs
Pinch of salt
Toss in butter, olive oil, herbs, etc. for serving.
*Note: approx. 3 ½ tbs. flour per egg
Making the dough:
Mix together the flour, eggs, and salt. The dough should reluctantly fall from a spoon. Let the dough stand for 20 minutes.
Cooking the Spätzle:
There are several ways to transfer the dough into the boiling salted water. You have a few options on tools.
You can go to the kitchen supply shop and spend about $15 – 50 on a Spätzlepresse, which ranges from a plastic mandolin sliding-type gadget on the lower end or the higher end item that resembles a potato ricer and doubles well as one. You will get consistent results with any of these products.
If your kitchen drawer is already full, you may have a colander in your cabinet: one with draining holes that aren’t too small. With this, you’ll just toss the dough into the colander and mash it through until it drops from the colander into the water. You can try this with a spoon, but it goes much more quickly with your hands.
Allow the dough to cook shortly in the water—about the time it takes for the spätzle to rise to the top of the pot. Remove and shock in water.